Embedded System Design
Embedded System Design
From 2.2025
2.2025 -2.2025 / Week 1 - Week 7
Gexianjing/0377636
Week 1
Assignment 1 Submission & Idea Illustration
Ever Seasons Express: An Interactive Embedded System Representing the Journey of Life
Embedded System Design
Embedded system design refers to the process of developing a hardware-software integrated system tailored for specific applications, enabling automation, data processing, or intelligent interactions. It involves multiple domains, including computer architecture, electronic circuits, software engineering, and real-time operating systems.
Assessment 1
1. Embedded System Design Process
(1) Requirement Analysis
- Define the system’s functional requirements, performance expectations, power constraints, and real-time demands.
- For example, your "Train Traveling Through Four Seasons" project requires processing voice commands, controlling lighting, and managing train movement, making it an interactive real-time control system.
(2) Hardware Selection
- Processor: 8-bit/16-bit/32-bit MCUs (e.g., STM32), embedded SoCs (e.g., Raspberry Pi), FPGA (e.g., Xilinx), etc.
- Sensors: Sound sensors (microphones), light sensors (LDR), accelerometers, etc.
- Actuators: Motors, LEDs, screens, speakers, etc.
- Communication Interfaces: I2C, SPI, UART, WiFi, Bluetooth, etc.
- Your project may require a Raspberry Pi or STM32 as the core, along with a voice recognition module, LED control circuit, and track control system.
(3) Software Architecture Selection
- Operating System (OS):
- Bare-metal (No OS): Suitable for simple real-time control (e.g., Arduino).
- RTOS (Real-Time Operating System): Suitable for systems requiring strict real-time constraints (e.g., FreeRTOS).
- Traditional OS (Linux/Android): Suitable for complex applications (e.g., Raspberry Pi).
- Device Drivers: Control hardware such as sensors and actuators.
- Application Layer: Handles data processing, logic control, and user interactions.
- Your project can use Raspberry Pi + Python programming, integrating open-source voice recognition libraries (such as Vosk) with GPIO to control the train, lighting, and interactive elements.
(4) System Implementation
- Code development (C, C++, Python, Embedded Assembly, etc.)
- Hardware soldering, PCB design, system integration
(5) Testing & Optimization
- Unit Testing: Verify individual module functionalities.
- Functional Testing: Ensure the system operates as required.
- Performance Optimization: Reduce power consumption, minimize latency, and improve stability.
- Your system may require testing for voice recognition accuracy, lighting synchronization, and the smoothness of train movement.
2. Key Features of Embedded System Design
- Real-time Performance: The system must respond to events within a specified time frame (e.g., triggering lights and train movement based on voice input).
- Low Power Consumption: Some systems require power efficiency optimization, such as wireless IoT devices.
- Reliability: The system must handle complex environments without crashes.
- Compactness: Hardware should be small and highly integrated.
- Application-Specific: Designed for specific use cases with fixed functionalities.
3. Embedded System Design Approach for Your Project
Core Concept:
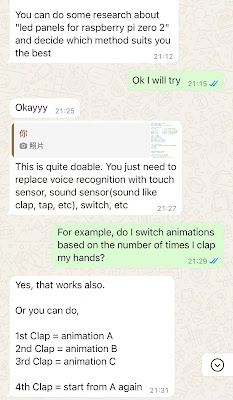
- Input: Sound sensor (voice command)
- Processing: Raspberry Pi (Python voice recognition + logic control)
- Output: Train movement (motor control), lighting effects (LED), rotating scene boards (servo motors)
Recommended Hardware:
| Hardware | Function |
|---|---|
| Raspberry Pi | Main processing unit, handles voice recognition and logic control |
| Microphone Sensor | Captures voice commands |
| GPIO Control Circuit | Connects LEDs, servo motors, and train track system |
| Servo Motors | Rotates scene panels to display seasonal changes |
| LEDs | Adjusts lighting color and brightness based on voice commands |
| Train Model + Motor | Controls train movement for an immersive experience |
Week 2
Embedded System Design Course Summary
In this course, we focused on the design process and the crucial role of design methodology in controlling workflows, enabling automation, and improving team communication.
The design process includes:
1. Requirement Analysis – Collecting and analyzing functional (e.g., button operations, information display) and non-functional (e.g., cost, power consumption) requirements.
2. Specification & Architecture – Refining requirements into precise specifications and planning system architecture.
3. Component Selection & Development – Choosing and developing suitable hardware and software components.
4. System Integration & Optimization – Ensuring seamless hardware-software integration, interface verification, performance optimization, and real-world validation.
By analyzing GPS moving map requirements, we gained insight into distinguishing functional and non-functional requirements. This structured approach helps transform needs into practical design solutions, ensuring the system meets real-world application standards while refining our skills for future projects.
Class Summary: Python Installation & Speech Recognition Integration
In the second part of the course, we learned how to download and install Python and integrate Google Speech Recognition and sound sensor functionalities. Below are the key takeaways:
1. Download and Install Python
We downloaded the latest version of Python from the official website and installed it, ensuring that Python was added to the system’s PATH for easy command-line access.
2. Install Required Libraries
To enable speech recognition and sound processing, we installed essential libraries, including SpeechRecognition and PyAudio. These libraries allow Python to process audio input and convert speech to text using Google’s API.
3. Understanding Google Speech Recognition
We explored how Google’s speech recognition technology processes audio input and converts it into text. This involved capturing voice input through a microphone and sending it to Google’s servers for analysis. The key takeaway is that AI-powered speech recognition can facilitate hands-free interaction and enhance embedded system applications.
4. Integrating the Sound Sensor
We examined how a sound sensor detects audio signals and interacts with an embedded system. The sensor is connected to a development board, such as a Raspberry Pi, and responds to sound by triggering predefined actions. This functionality is crucial for applications that require audio-based automation and interaction.
Conclusion
By completing this lesson, we successfully set up a Python environment, explored Google Speech Recognition, and learned how to integrate a sound sensor. These concepts provide a strong foundation for future projects in embedded systems and interactive voice-based applications.
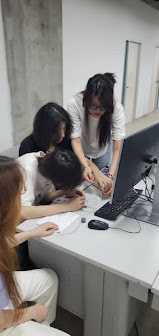
The teacher patiently taught us how to connect the Raspberry Pi to the computer and the positive and negative poles of the wires. Understood the different uses of VCC, GND, DO, AO, and OUT interfaces
And teach us how to write code to turn on and off lights. Including the connection and usage of touch sensors. Very interesting, we were amazed to find that the light would turn on when we touched the sensor.
For Assignment 2, my teacher provided several suggestions for the Four Seasons Train model concept. For example, he advised me to replace the LED screen with an OLED screen to reduce purchasing costs and connection complexity. He also recommended using 4-pin LED lights instead of LED strips.
My teacher patiently guided me on how to proceed and recommended the correct specifications for the hardware components.
Week 5
Week6
At this step, we encountered some issues where the code was highlighted in red indicating input errors. After consulting with the teacher to make adjustments, we found that our group name had not been modified and the network was not connected in advance
With the help of the teacher, we successfully demonstrated an animation of the little character walking, but it cannot be controlled by touch, so the next step is to connect touch to the OLED screen
Mr. Nedu accurately identified the line where the touchpad command from the courseware should be inserted and guided us through the modifications step by step. During execution, we encountered an issue where the GPIO settings could not be found. With the help of Google, we later identified the problem and successfully fixed the code defects.
Week 7
🌿 Echo Team Embedded System Design Project: Interactive Experience of the Four Seasons Train 🚂
1️⃣ Project Background
The "Four Seasons Train" is an embedded system design project. During the implementation, we simplified the model to present the core theme in a lightweight manner. The system uses touch interaction to play animations and change lighting colors 🎨✨.
We primarily utilized four key hardware components:
📺 0.96-inch OLED screen
⚡ 68Ω and 100Ω resistors
💡 4-pin LED light
🍓 Raspberry Pi 2
(📷 Show individual hardware photos and a time-lapse of the entire process)
2️⃣ Interactive Experience: Touch the Flower ✋🌸, Character Walks 🚶♂️
👉 By touching the small flower, the hidden touch sensor is triggered, controlling the OLED screen playback, where a walking character animation appears 🚶♂️💨. (📷 Close-up of the touch flower, OLED screen, and the touch sensor on the back)
💡 Interaction Process:
✅ When touching the flower, the walking animation starts 🎬🟢
❌ When releasing the touch, the animation stops ⏹🚷
(📜 Show OLED programming process)
3️⃣ Visual Enhancement: 4-Pin LED Light 💡🌈
Next, we showcase the LED light integration and visual effects ✨:
💡 4-pin LED light changes colors based on user interaction (📜 Show LED programming)
🌈 The light smoothly transitions between four different colors (📷 Display lighting effects)
🎛 Controlled by Raspberry Pi 2, allowing users to select colors and enhance immersion 🌌
4️⃣ Hardware & Software Implementation 🖥🔧
📌 Hardware:
- Raspberry Pi 2 as the main controller, connected to the OLED screen, touch sensor, and LED light 💻🔗
📌 Software: - Programmed using Python 🐍 to control animations and LED color transitions 🎨
📌 Decorations: - Clouds ☁️ + Walking Character 🚶♂️ create a 🌿 fully immersive flower field experience (📷 Show decoration progress)
5️⃣ Project Significance 🌱🤔
(📷 Group photo 📸)
🌸 By touching the flower, users interact with the "Four Seasons", prompting reflections on different life stages and experiences 🎭💭.
💡 The Echo team continuously optimized the interactive experience, ultimately delivering an elegant and meaningful embedded system design. We hope to provide the audience with an immersive and thought-provoking experience 🎆🚂.


Comments
Post a Comment